Clumsy Kanga Safety Video
Keep your Children Safe inside of the Bounce House !!

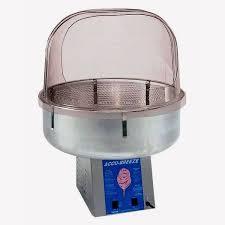
Cotton Candy Machine
Setup of machine will be completed by Jolly Jumps team.
Making Cotton Candy:
Turn both switches to the ON position (rotating switch and heating switch)
Once heating switch is turned on, cotton candy sugar is heated and thrown to the sides of bowl.
Caution: first 1 to 2 minutes of operation throws out hard sugar particles because the machine is not heated yet. Makesure everyone is standing about 3 to 4 feet back.
Take cone and rotate around bowl until cotton candy has collected.
Potential Problems:
Makesure both switches are turned on. If heating switch is not turned on it will simply throw out hard sugar particles.
Makesure screws are tightened or else machine will not work properly.
Makesure electricity cord is plugged into the electricity outlet or machine will not operate.
For Further Assistance: Please call (805) 484-0026 or email: ashish@jollyjumps.com

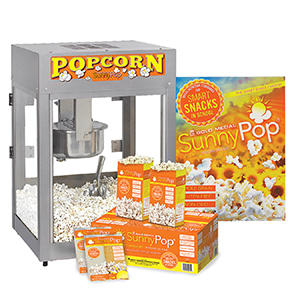
Popcorn Machine
Setup will be completed by Jolly Jumps team.
There are three switches on the popper.
LIGHT AND WARMER SWITCH:Turns on heat to bottom corn pan and light.
KETTLE MOTOR SWITCH: Turns on motor, which drives kettle agitator shaft.
KETTLE HEAT SWITCH: Turns on heat element.
Making Popcorn:
Turn kettle heat and kettle motor switch "ON". Allow 7 to 10 minutes for kettle to warm.
Pour about 6 to 8 ounces of prepared kernels into kettle.
When corn has finished popping, dump kettle.
Repeat steps 2 and 3 again (there is no need to warm kettle after first time).
Once you have made enough popcorn to fill bottom compartment, turn motor switch and heat switch off. Turn on light and warmer switch to keep popcorn warm.
Empty bottom corn pan after you have finished making your popcorn.
Caution: Do not touch the kettle while on, it is hot and can cause serious burns.
Potential Problems:
Leaving popcorn in kettle for too long can cause popcorn to burn.
If a batch of popcorn has been burned, you must first clean the inside of the kettle before preparing another batch.
For Further Assistance: Please call (805) 484-0026 or email: ashish@jollyjumps.com

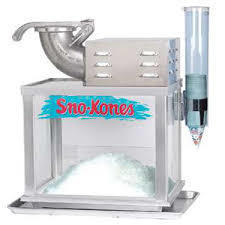
Sno Kone Machine
Setup Snow Kone machine on a secure table top
Plug in power cord in to electricity outlet.
Making Snow Kone:
Fill the hopper to within an inch of the top with ice cubes.
Switch the motor on. Wait for the motor to come to full speed (a minute or so).
Push the pusher handle down against the ice in the hopper. Apply firm and even pressure to make the best snow.This allows the ice to resettle against the shaver head.
Once ice has been shaved and has collected in the bottom compartment, use scoop to fill cone(s) with the shaved ice. Apply any flavored syrups as desired.
Caution: Never put any object into the snow kone machine body while the motor is running. Serious damage can occur to any body parts or objects that are placed inside the snow cone machine hopper.
Potential Problems:
Too much pressure will result in snow that is coarse: too little pressure will make the snow mushy
Makesure electricity cord is plugged into the electricity outlet or machine will not operate
For Further Assistance: Please call (805) 484-0026 or email: ashish@jollyjumps.com
